This easter I was egg-specting to see hot cross buns sold in bakeries, easter bunnies in the malls and other hoppy-looking decorations. I didn’t quite carrot all that I wasn’t in North America. Easter HAD to be internationally celebrated in at least some ways! After all, the Easter Bunny is almost as famous as Santa there. I didn’t quite feel the Easter ambience as strongly here in Singapore, but sure enough I was at least enjoying some of these lovely decor put up at Gardens by the Bay.

Ahhhh, yes. I’ve been traveling around Asia and Aussie, as well as re-exploring Singapore this past month. It’s been wonderful learning so much about the different cultures, languages and histories. And hence this also explains my delayed blog post! Of course, Easter bakerthon is NOT to be missed! So, here I present to you my Ostern Kuchen! (German)
To me, the art of cake making is really all about improvising. More often than not, the cakes I make don’t end up exactly the way I initially intend them to. I often succumb to improvisation and resort to substitution, using the ingredients I have in my kitchen pantry. It’s not too fun when you find out that you’re out of butter at 10pm at night when your cake is halfway done! Yes, heart-aching isn’t it? That moment when you realize that the butter has been immensely depleted after your return from vacation. :'(
Anyway, here is the final product.
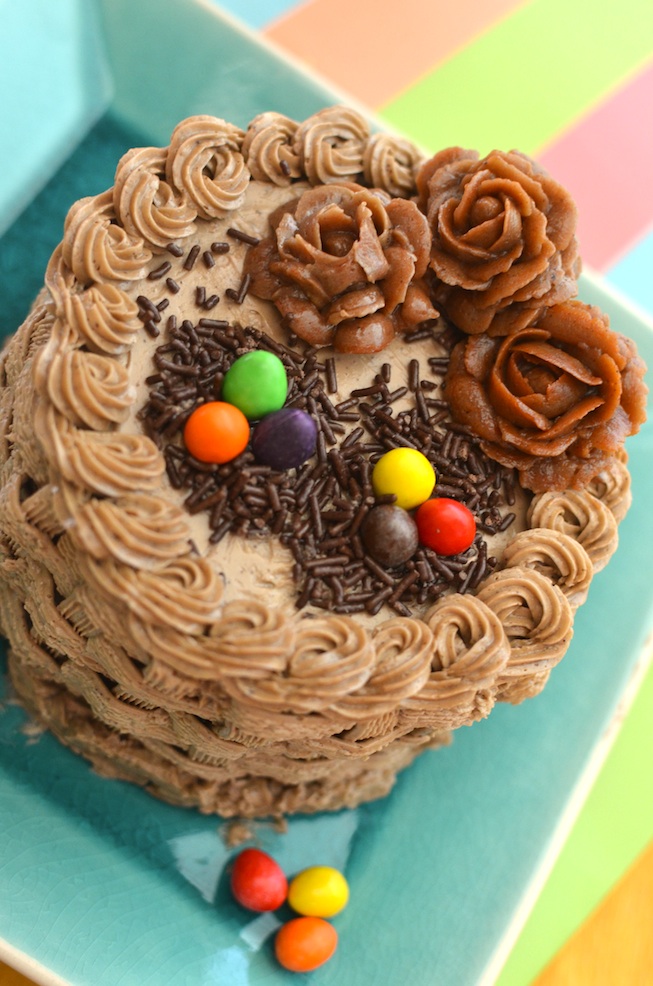
Vanilla and Chocolate Mini Cakes
recipe 2/3 from Joy Of Baking
Ingredients
- 1/3 cup unsalted butter, room temperature (if you’re in tropical Singapore just use cold butter)
- 1/2 cup granulated white sugar
- 2 large eggs
- 1/2 teaspoon pure vanilla extract
- 1 cups all purpose flour
- 1 teaspoons baking powder
- 1/4 teaspoon salt
- 1/4 cup milk
- 2 tablespoons cocoa powder
Directions
- Preheat oven to 350 degrees F (180 degrees C).
- In the bowl of your electric mixer, or with a hand mixer, beat the butter and sugar until light and fluffy. Add the eggs, one at a time, beating well after each addition. Beat in the vanilla extract.
- In a separate bowl whisk together the flour, baking powder, and salt.
- With the mixer on low speed, alternately add the flour mixture and milk, in three additions, beginning and ending with the flour. Scrape down the sides of the bowl as needed.
- Divide the batter into 2 and add cocoa powder into one of them.
- I baked my cakes in a 4-inch cake pan, one at a time for about 15-20 minutes each. Do not over bake or the cupcakes will be dry. Remove from oven and place on a wire rack to cool. Once the cakes have completely cooled, SHAVE OFF THE CAKE DOMES. Please shave off any cake domes to cake perfectly flat cakes. This will help when frosting later.
I used a 4-inch cake pan because: a) My family isn’t the biggest fan of sweets, and b) Shaving off the cake domes will significantly decrease the height in your cake and thus a 4-inch cake would still maintain a majestic height compared to that of an 8-inch.

Frosting
recipe 1/5 from Martha Stewart
Ingredients
- 1/2 cup sugar
- 2 large egg whites
- 3/4 cup + 1 tablespoon unsalted butter, cold and cut into pieces
- 1 tablespoon cocoa powder
- 1/4 teaspoon chocolate paste / brown-colour paste
Directions
- Place sugar and egg whites in the heat-proof bowl of an electric mixer. Set bowl over a pan of gently simmering water, and whisk until sugar has dissolved and egg whites are hot to the touch, about 3 minutes. Test by rubbing the mixture between your fingers; it should feel completely smooth.
- Transfer bowl to mixer stand. Using the whisk attachment, beat on high speed until mixture has cooled completely and formed stiff and glossy peaks, about 4 minutes.
- Add the butter, one piece at a time, and beat until incorporated after each addition. Don’t worry if the buttercream appears curdled after all the butter has been added; it will become smooth again with continued beating. Add powder and paste, and beat just until combined.


Decorating
You will need
- Chocolate sprinkles – the “nest”
- Jelly beans / egg-shaped chocolate
- Equipments
- Basket weave: Wilton Tip 47
- Top border: Wilton Tip 17
- Mini Roses: Wilton Tip 102
Unfortunately it is rather hard to explain how to pipe out the designs. But the very simple solution to that is YOUTUBE! Easily DIY. 🙂
- Start off by stacking both cakes together, using the buttercream as a glue between them.
- Frost a thin layer of buttercream on the outer layer for smooth surfaces.I didn’t do this but I recommend you do as I realise it will help conceal any imperfect piping
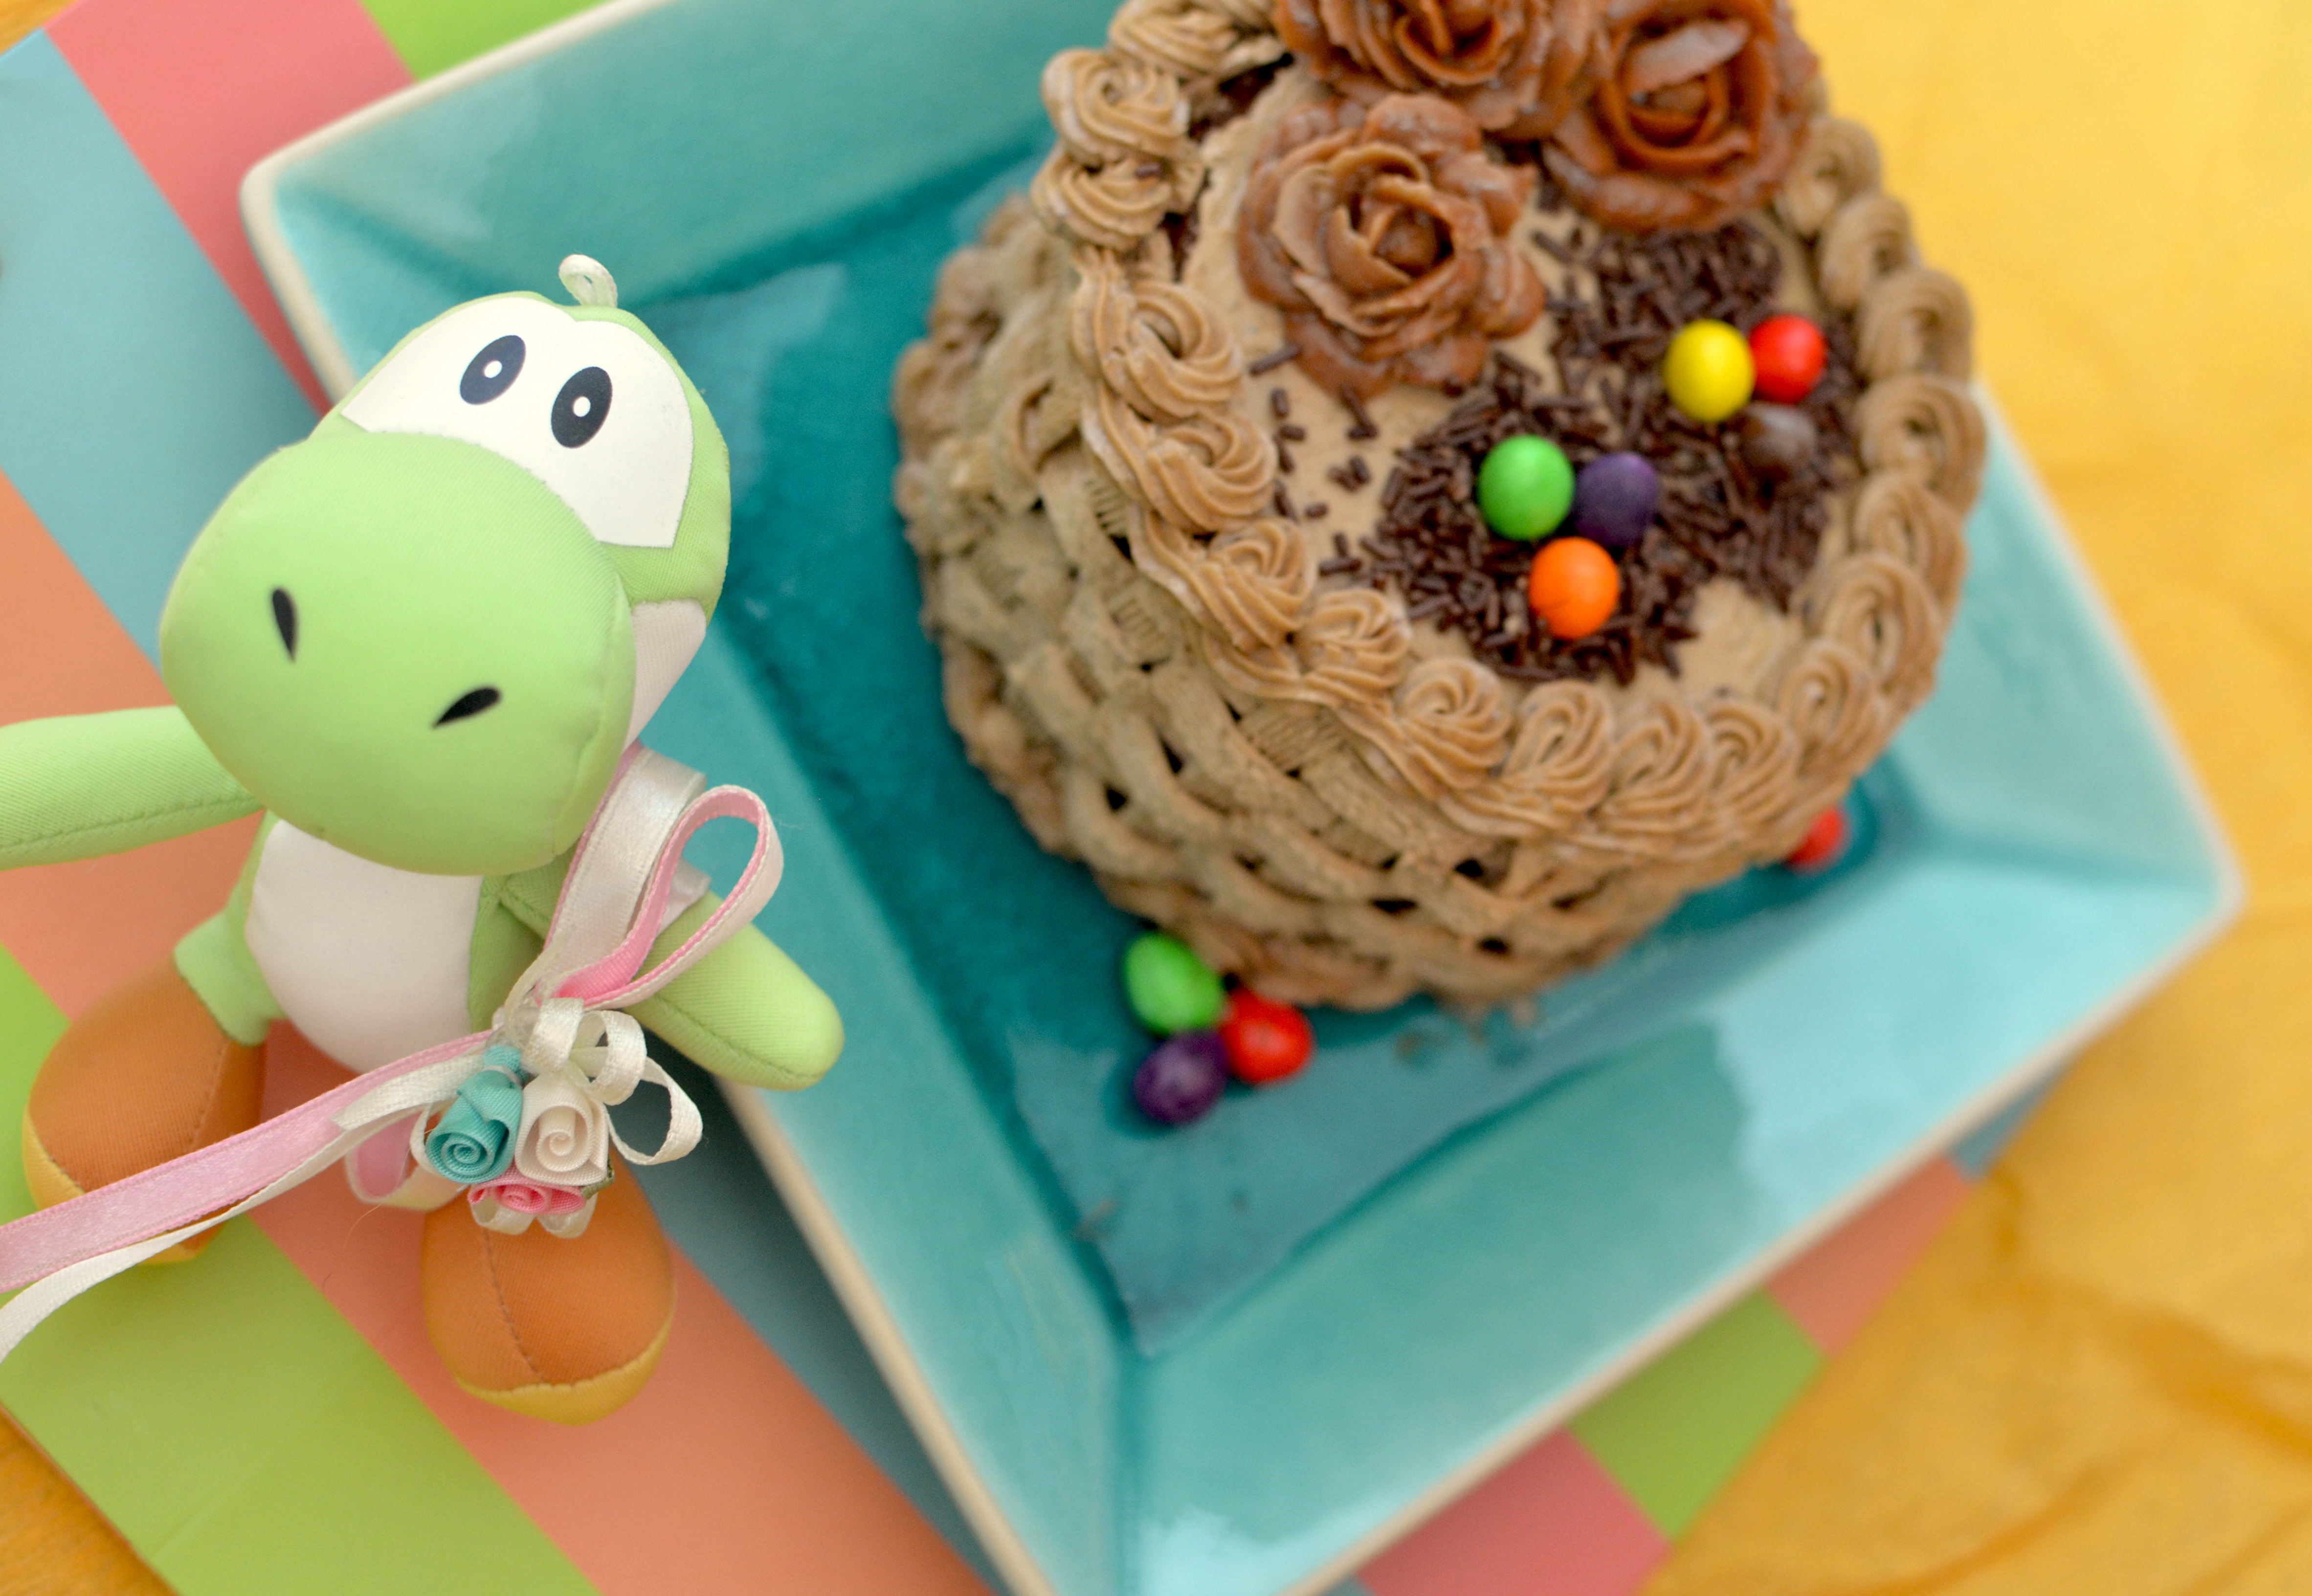
- Pipe the basket weave on the side of the cake, followed by the top border and finally the roses. The “nest” and eggs are pretty self-explanatory!
That’s it!
Happy Easter to all the world! Frohe Ostern! Joyeuses Pâques! Feliz Pascua! Maligayang Pasko ng Pagkabuhay! Selamat hari Paskah! 부활절을 잘 보내세요! 复活节快乐!
xoxoxo

Yoshi!!!


I’ve been thinking about you, Sam! So glad to hear that you are seeing the world! Ok, your caked is so crazy adorable! I love every detail, especially the basket weave and egg nests!
Oh these are adorable! Love all the little garnishes you used. Glad you’ve been traveling and enjoying yourself.
What a cute little cake!
Happy Easter Sammi! Firstly, I love little yoshi and his eggs there, too cute. 🙂 Secondly, you do know that you have a gift right? That cake looks so incredible. Your double layer, choc & vanilla extravaganza is gorgeous. I look at the way you frosted the cake (with those) petals and the basket weave, plus it’s a Swiss meringue buttercream which is a very tricky thing to balance!
I’d love to know which piping nozzles and equipment you used.
I think you might have missed your calling!
Happy Easter Sammie! What a beautiful basket weave. So detailed and I know it is a lot of work and you have to work quickly because it melts or changes consistency. I can’t wait to hear more about your travels and maybe some foodie inspiration from your excursions. Take care, BAM
That is one of the most beautiful frosting pattern ideas ever my friend – love it!
Have fun travelling 🙂
Happy Easter!
Choc Chip Uru
Welcome back Sammie, and stunning piping 🙂
Traveling rocks. This is an adorable Easter cake. Very impressed with the basketweave piping.
what a lovely and delicious cake, lovely garden photo too 🙂
Wow I am impressed, nice work on the icing
This little cake is so incredibly pretty and you make it sound so easy to prepare!
Thanks for sharing!
Hi, I’m Ana from Fooduel.com. It is a site in which users vote recipes
from 1 to 10.
There is a ranking of the best recipes and a profile with your voted recipes. Each recipe has a link to the blog which belongs the recipe. This way you will get traffic to your blog.
It’s easy, fast and fun. The best Photo recipes will be here.
I invite you to enter, add your blog and upload a recipe with a nice photo.
You are able to see your stats:
-Number of visits to your blog from Fooduel.com.
-Number of votes received every day
-Number of votes received by each category
-Number of votes for each grade (1-10)
-Number of votes for each recipe.
Look this example of one profile stats: http://fooduel.com/stats1.png
We would love that you participate with some recipe. Looks Amazing!
Regards
http://www.Fooduel.com
Wow Sammie, what a beautiful cake…love the basket weave pattern…love it!
Hope you had a wonderful Easter and a fun week 🙂
This is the only time I’ve been to your website. Thnx for sharing more details.
This is so cute, I’m in love !=)
That is seriously one of the prettiest cakes I’ve ever seen!!
I’m super-impressed with the basket weaving piping! What a lovely cake and yes, it is a great looking Easter-themed cake. I would like to try this – I’ll just have to see if I can do basket weaving piping xx
WOW, your Easter cake looks amazing! You seriously have some awesome decorating skills. And I love the first pic of you – too cute!
Awww! Thanks Sandra! I actually had another picture in mind of how i wanted my cake to turn out like but yeah! This will do I guess! Hehe
What an exquisite cake!!! Saw it on your homepage and just had to comment! LOVE the basketweave, but I’ve been too intimidated to try it. You’ve given me hope…
Haha thank you! Ya. Traveling is always fun! 😀 been meaning to put up pictures but got so lazy!
Thanks dear! 🙂
Yeah! Frosting and piping can get really messy sometimes!! And yes! Still need to put up those pictures lol
Prettiest Easter basket — ever. Plus, it’s entirely edible. You can’t ask for better than that. 😉
You did such a good job at the piping! It’s not the easiest is it but you made it look perfect 😀
OMG, Sammie..the basket weave is one of the first piping skills I ever learned and I LOVE it, even though I never get as gorgeous a weave as yours! What an awesome Easter cake! I hope you and your family had an amazing g Easter holiday!
I am so impressed by the woven patter on the cake!! That doesn’t seem like human’s work… just kidding! Wow, I wish I can make that beautiful cake, or even better…eat it… 🙂
Wow…this cake looks amazing! It must have taken a lot of patience…it looks beautiful!
I LOVE your basket weave design. I’ve always wanted to learn how but you’ve done a fantastic job with this cake. Amazing.
I love this cake. so cute!